Table of Contents
- Creating Fax Campaign
- Send Fax
- Receive Fax
- My DIDs
- Receive Fax
- Contacts Management
- Contact Group
- Contacts
- Manage Fax Documents
- Administration
- Branding
- User Management
- Fax Retention
- CDR Reports
ICTFax Fax Portal offers a multi-tenant and white label fax solution that provides both outbound and inbound online fax services to its customers, similar to EFax.
The ICTFax Fax Portal is an application that serves as an Email to Fax, Fax to Email, and Web to Fax gateway. It also provides REST API’s and supports T.38 and G.711 pass through and PSTN faxing. This application offers a user-friendly environment where tenants can easily manage:
Creating Fax Campaign :
Fax campaign is used for Bulk Fax Marketing, Following steps are required for creating new campaign:
- Login as into ICTFax Fax Portal
- Open the navigation menu and select “Campaign” from it
- Click on Create Fax campaign button from top left corner
- Create Fax campaign page will open, enter the required information in desired boxes
- Choose/upload the fax document
- Select the contact group
- Select the number of retires & call per minutes and save
- click on start button to start
Send Fax :
ICTFax Fax Portal also support single fax marketing,
To Add new Fax:
- Login into ICTFax Fax Portal
- Open the navigation menu and select the “Send fax” from it
- Click on the send fax menu, a page will open user can see and monitor the outbound fax lists.
- Click on the New Outbound fax button from top left corner
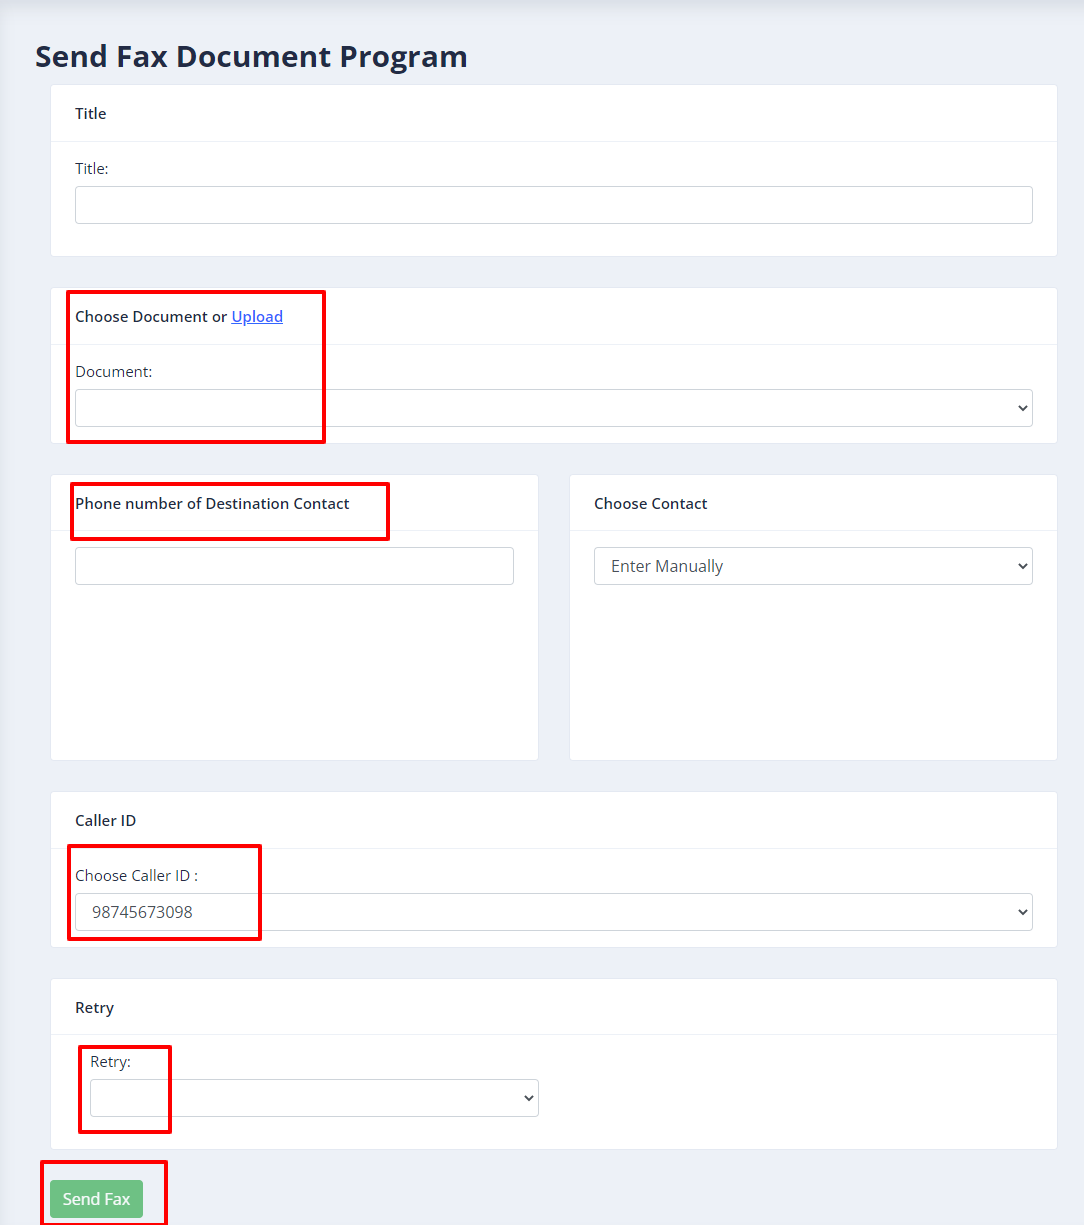
- Send Fax document page will open, enter the required information in the desired fields
- Enter the Title of the fax
- Choose/upload fax document
- Enter the phone number of destination contact to which this fax will send
- Select the Caller id & and number of retries
Receive Fax :
Fax-2-Email setting / My DID’s :
All available and assigned DID numbers will be displayed under the “My DIDs” menu. The tenant can then assign a DID number to an email address and any user associated with it. This means that all incoming faxes will be forwarded to the configured email and also displayed to the designated user.
Following steps are required:
- Open the navigation menu and select menu”My DIDs”
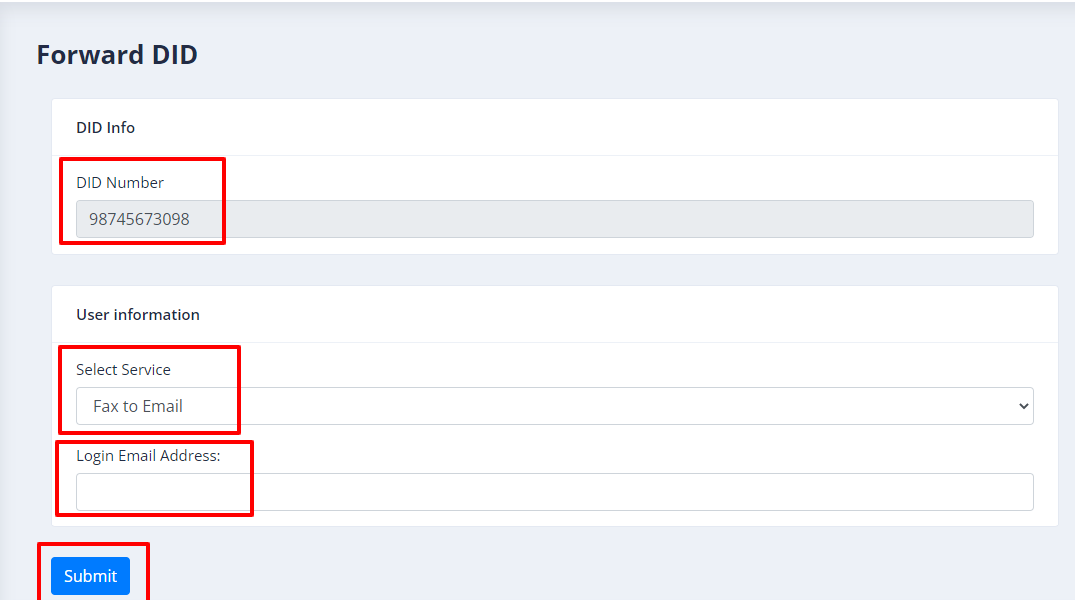
- Click on forward arrow from operation field
- Under Forward DID page, select Fax to Email service, enter email address and save it. (now if ICTFax receive incoming fax on that DID number then it will be forwarded to configured email address and also show under “Receive Fax” page)
![]()
Receive Fax
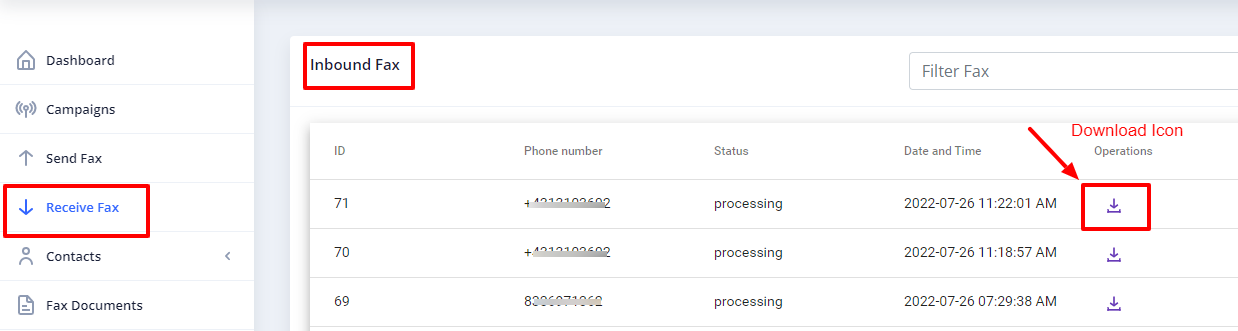
- Open the navigation menu and select the”Receive fax” menu from it
- Tenant can download the incoming fax by clicking on download icon
Contacts Management :
In order to manage contacts in ICTFax Fax Portal, following steps are needed:
Contact Group
- Open the navigation menu and select the main menu” Contacts” from it
- Select the sub menu”groups” and click on it
- Group list page will open, admin/user see and edit group list

- Click on Add group button to add new group
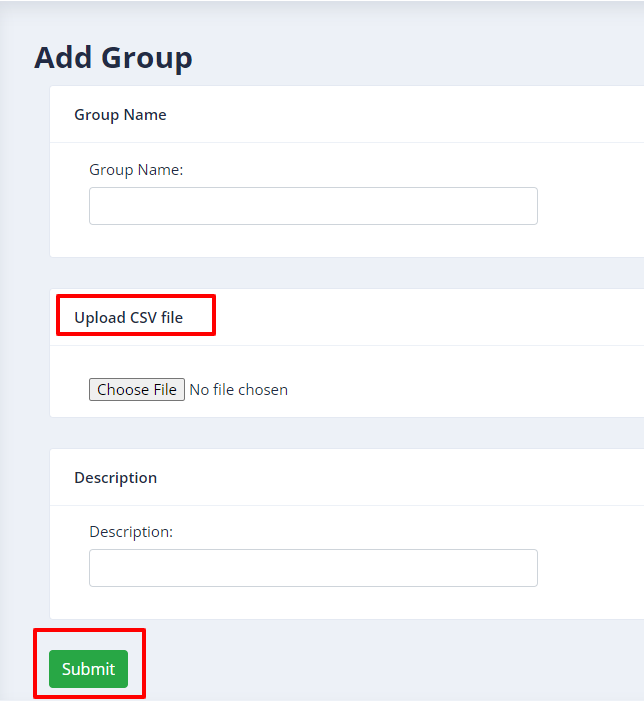
- Add group page will open then add required information in boxes
- Enter group name & upload the CSV file
- Write description about group if required
Create new Contact:
- Open the navigation menu and select the main menu” Contacts” from it
- Select the sub menu”contacts” and click on it
- Contact list page will open, user/admin see and edit the contacts
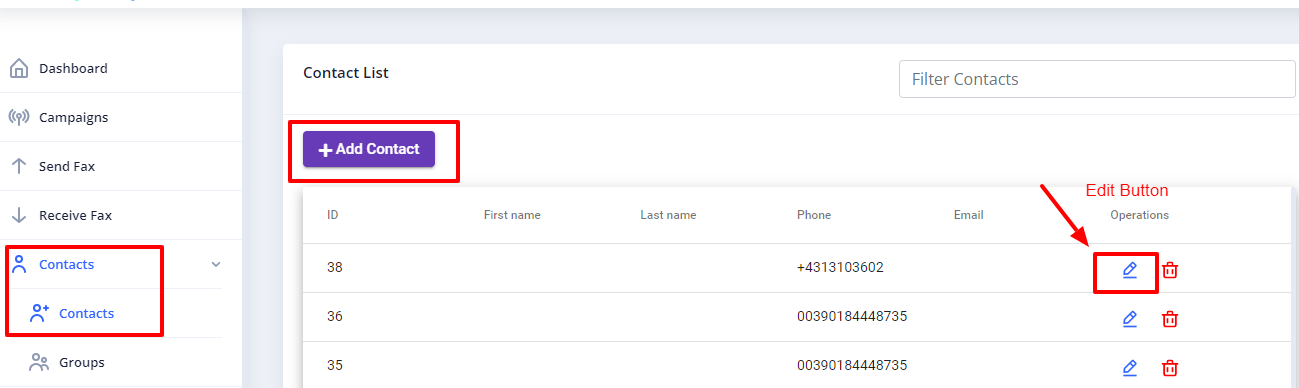
- Click on Add contact button from top left corner
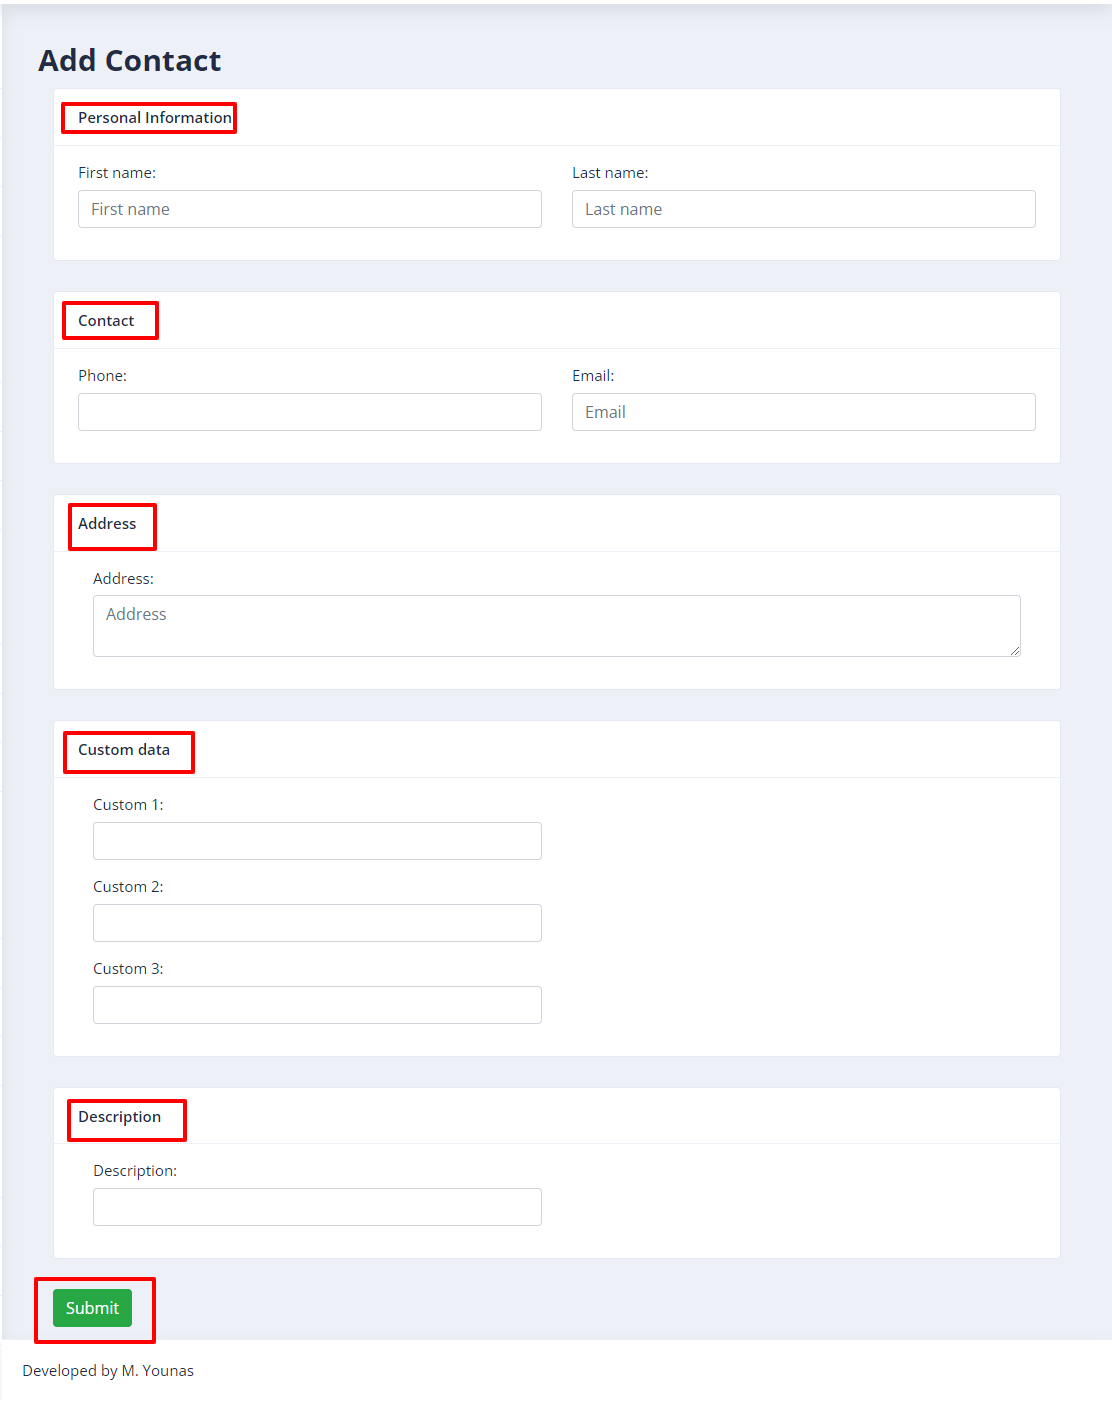
- Add contact page will open, add required information in the desired boxes
- Enter personal information such as first name & last name
- Add phone number & email
- Add custom data and address if required (optional)
Manage Fax Documents :
Each tenant can manage his own fax document and upload separately with title.
- Open the navigation menu and select menu”Fax document”
- Click on Add document as shown in above image
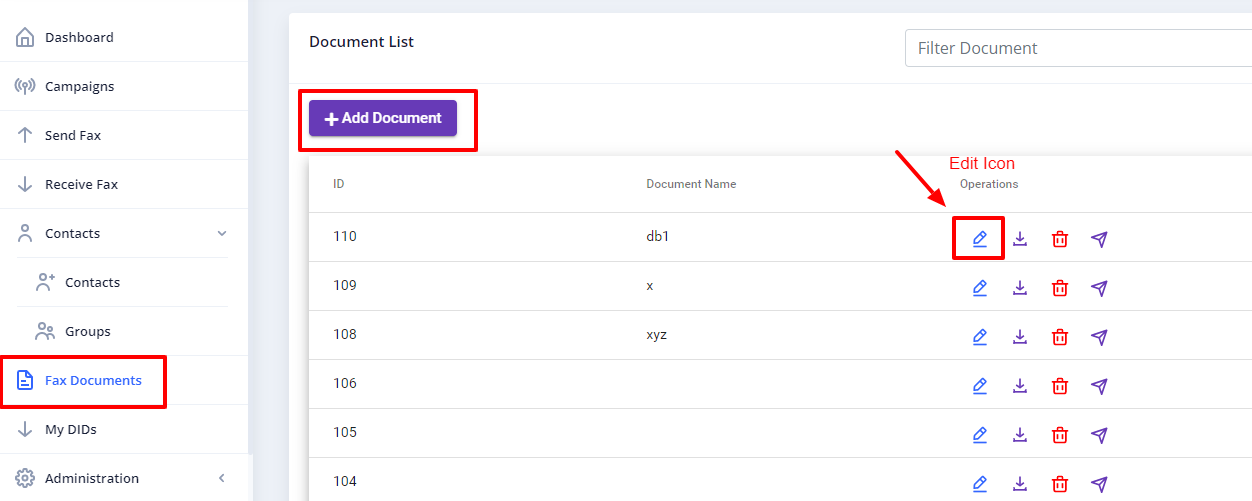
- Add document page will open, enter required information in desired fields
- Enter document name & upload the document from your device
- Select the fax quality type such as standard/fine/ super
Administration :
Tenants can manage their own branding, fax retention period, and create/delete users from the Administration menu.
Branding :
The ICTFax Fax Portal supports branding, allowing tenants to change their logo and company name as needed
Following steps are required for Branding:
- Open the navigation menu and select the main menu”Administration”
- select the sub menu”Branding” and click on it
- page will open, admin can change company name and logo as required
- Write domain name in desired box
- Add domain title & Footer text
- Add the Company logo by uploading file
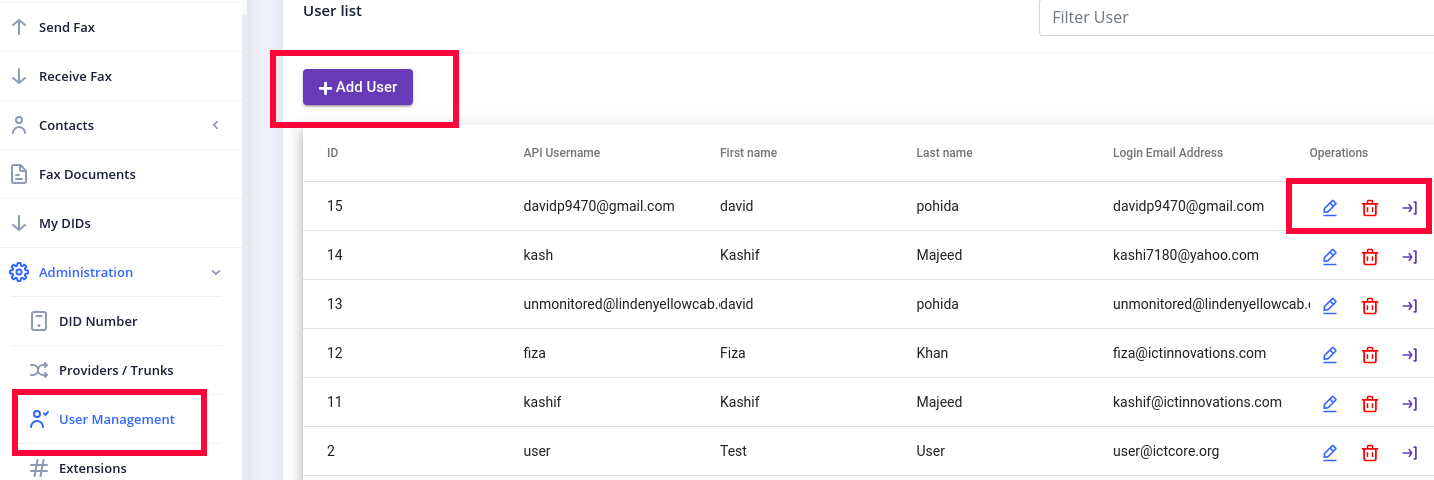
User Management :
ICTFax Fax Portal allow tenant to add/remove their users, and users will utilize the tenant resource like fax limit, trunk, assigned DID
- Open the navigation menu and select the main menu”Administration”
- select the sub menu”User management” and click on it
- User list page will open, admin see, manage and add new user
- Click on Add User button
- Add user page will open, add required information in desired boxes for add user
- Add API username
- Add the password the again confirm the password
- Add User’s first name and last name
- Add phone number & login email
- Select the User role and also choose Tenant
Fax setting :
ICTFax supports fax cover-page option, when tenant enables this option, the recipient will receive contact information about sender before actual fax message like (Send by, Send to, Phone, Date, Subject), etc.
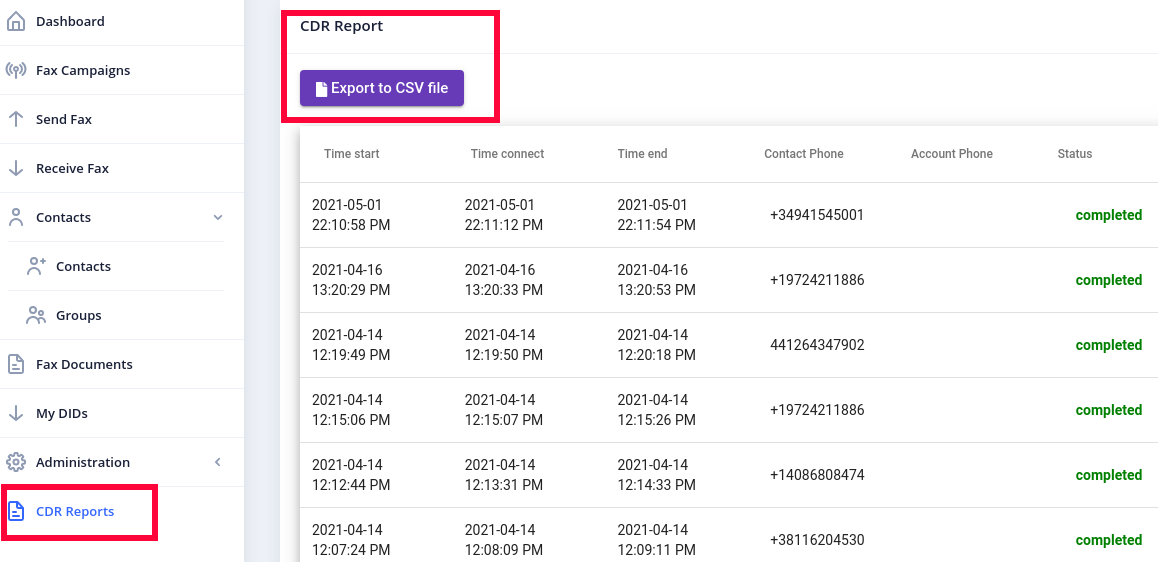
CDR Reports :
CDR menu provide complete details of calls like (Call start time, Call end time, Call Status) etc which helps users to analyze results.
ICTFax Tenant Guide
ICTFax is a multi-tenant fax portal. As a tenant, you manage your own users, DID numbers, caller IDs, and fax limits independently from other tenants. This guide covers every feature available to the tenant role.
Table of Contents
- 1. Dashboard
- 2. Send Bulk Fax (Campaigns)
- 3. Send Single Fax
- 4. Receive Fax / Inbound Fax
- 5. Contacts Management
- 6. Fax Documents
- 7. My DIDs (Fax-to-Email)
- 8. My CIDs
- 9. Administration
- 10. Configuration
- 11. Reports
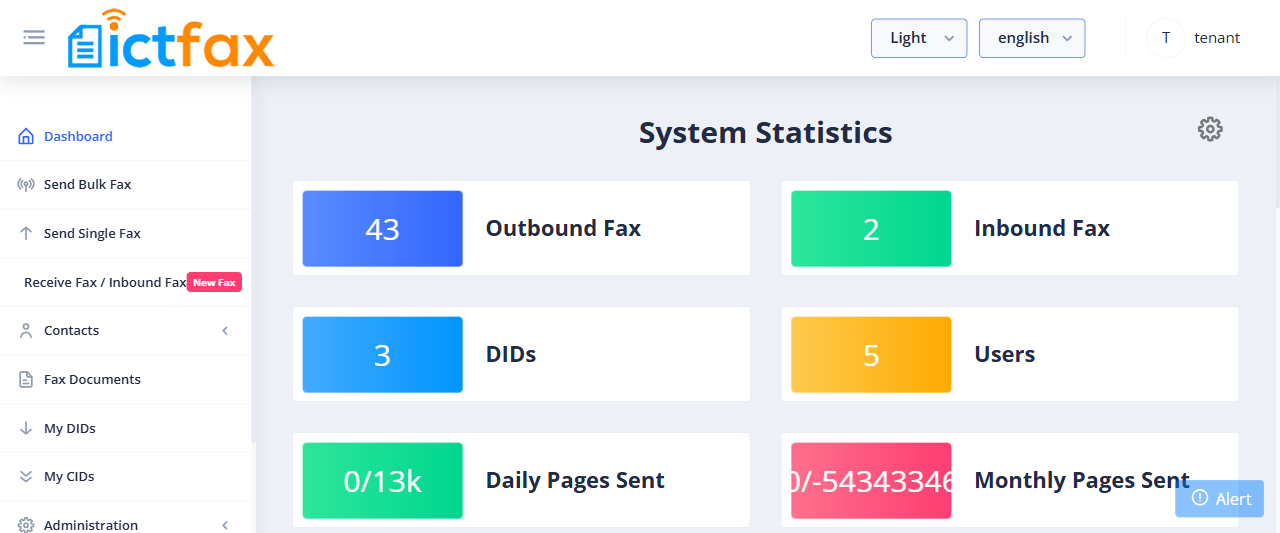
1. Dashboard
After login, the Dashboard shows your tenant-level System Statistics: total outbound faxes sent, inbound faxes received, assigned DID numbers, and users under your account. The recent outbound fax table lets you monitor the latest jobs at a glance.
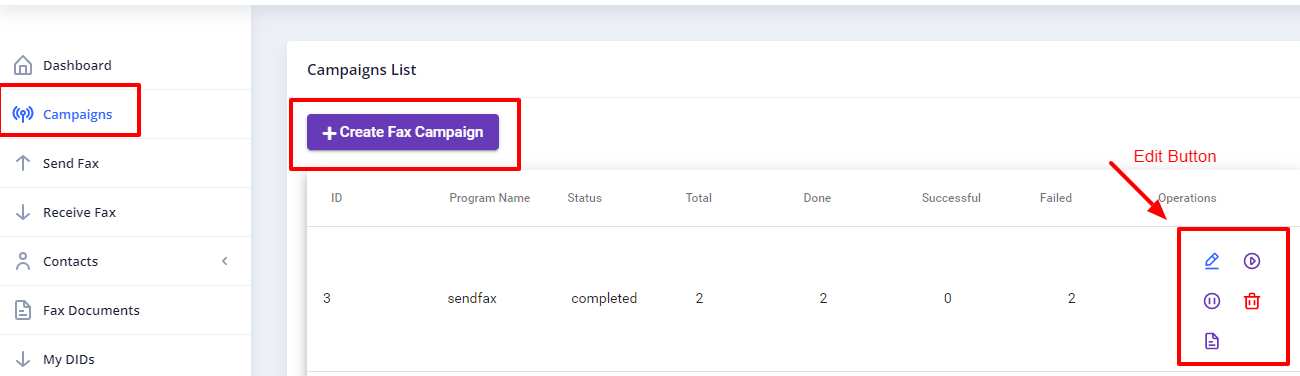
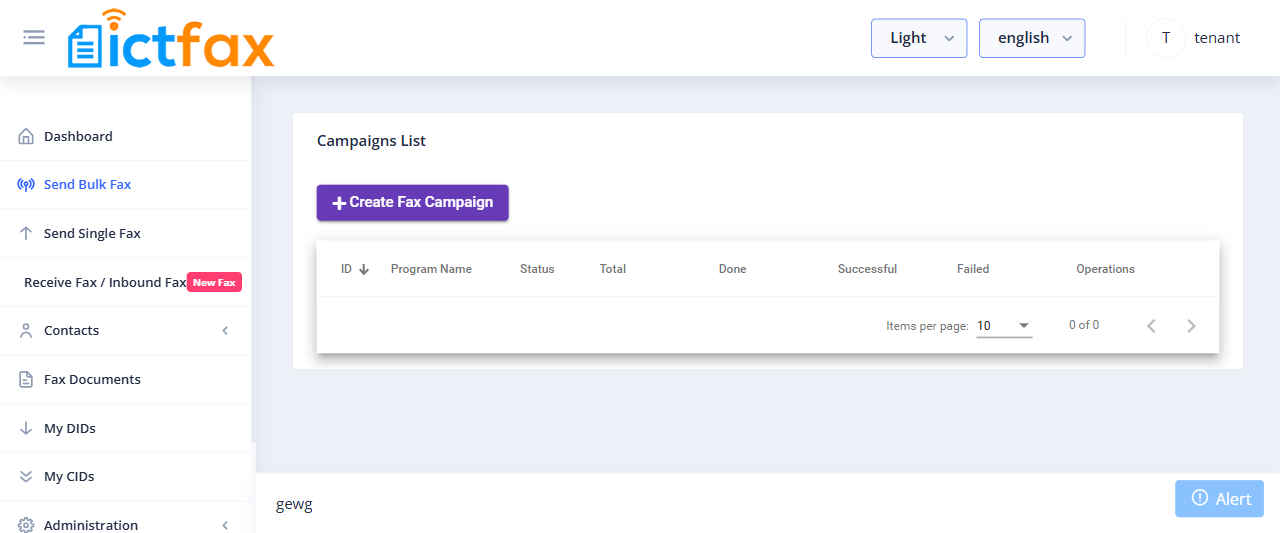
2. Send Bulk Fax (Campaigns)
Fax campaigns let you send a single fax document to a large contact list in one operation.
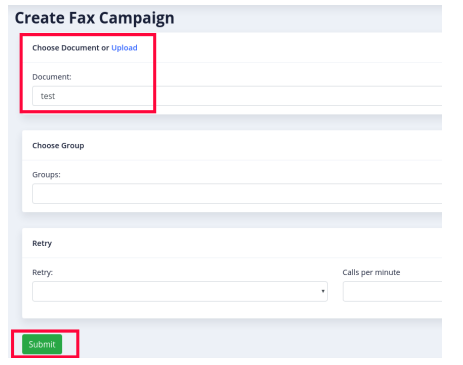
Steps to create a campaign
- Open the navigation menu and select Send Bulk Fax.
- Click Create Fax Campaign.
- Enter a campaign title and choose the fax document.
- Select the contact group you want to send to.
- Set the number of retries and calls per minute, then save.
- Click Start to launch the campaign.
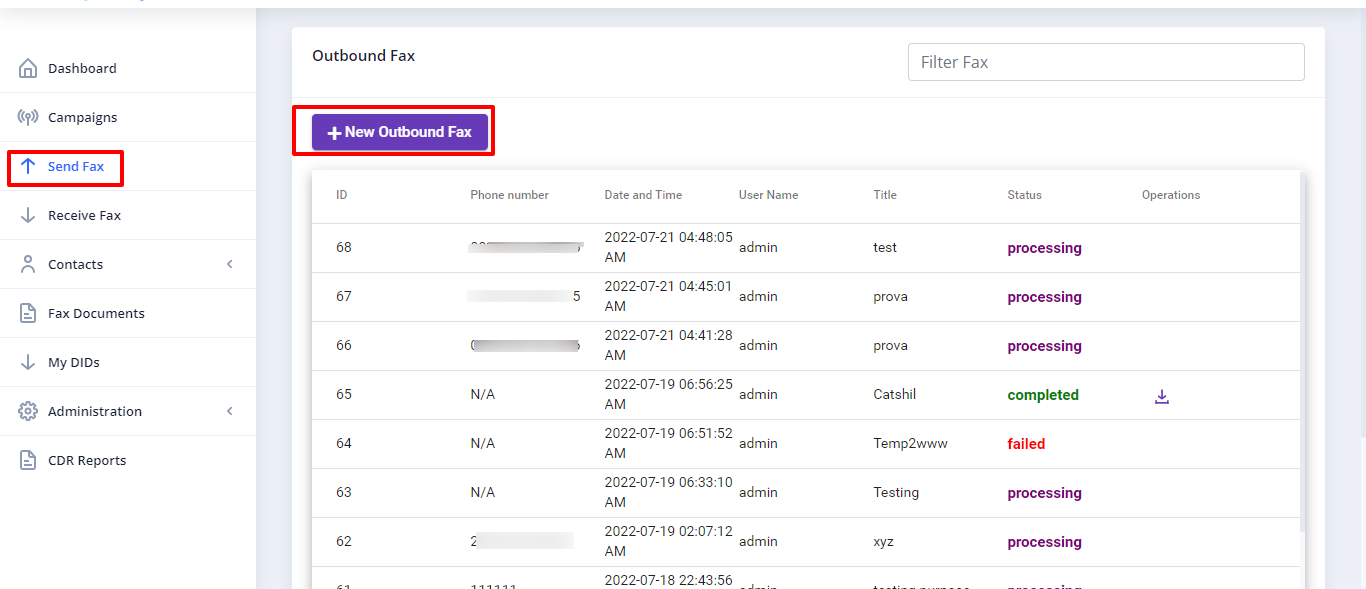
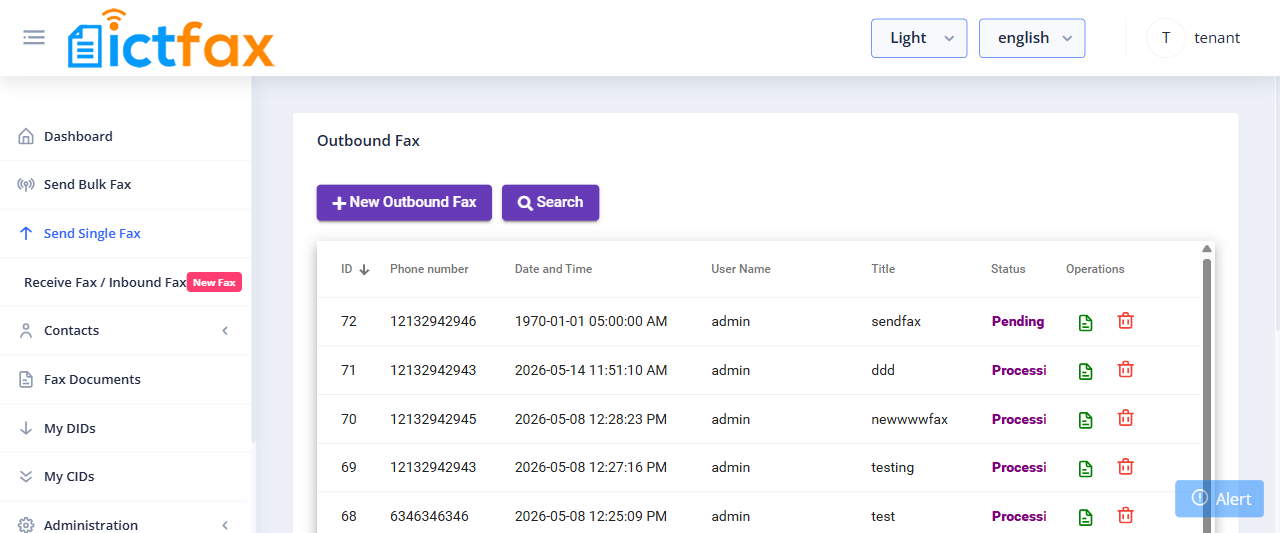
3. Send Single Fax
Send a one-off fax to a single recipient directly from the portal.
Steps to send a single fax
- Select Send Single Fax from the menu.
- Click New Outbound Fax.
- Enter the fax title and upload your fax document.
- Enter the recipient’s phone number.
- Select your Caller ID and the number of retries, then submit.
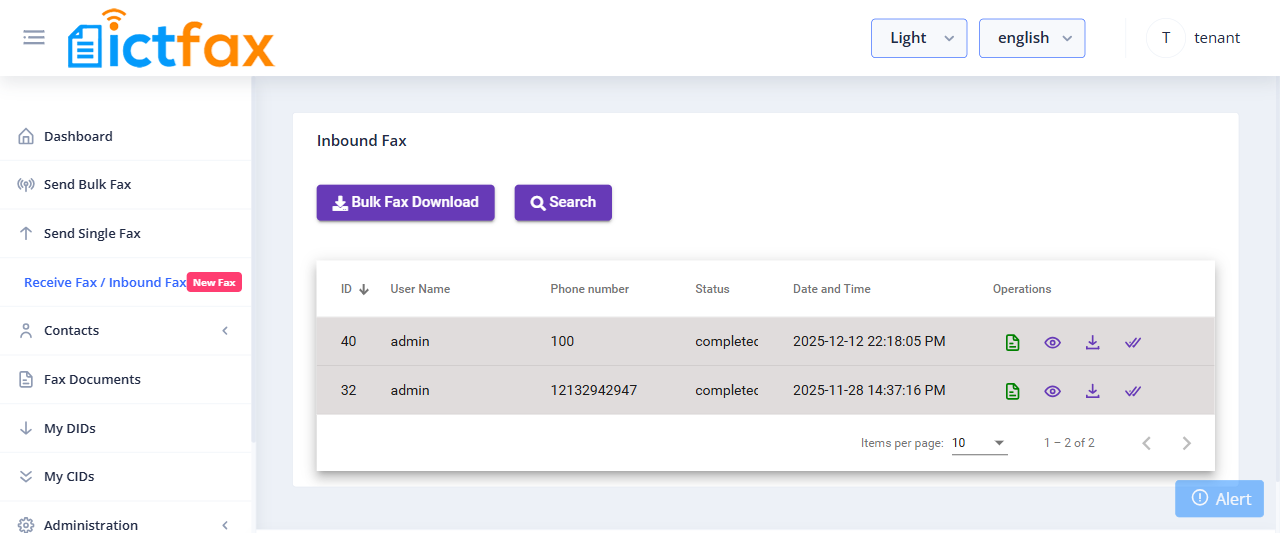
4. Receive Fax / Inbound Fax
All faxes sent to your DID numbers appear in Receive Fax / Inbound Fax. You can download any received fax by clicking the download icon next to it.
Setting up Fax-to-Email forwarding
- Go to My DIDs and click the forward arrow for the DID you want to configure.
- Select Fax to Email under Forward DID.
- Enter the email address to forward faxes to, then save.
- From this point, any fax received on that DID is automatically emailed to the configured address and also appears in the Receive Fax list.
5. Contacts Management
Contact Groups
Create contact groups to use as recipient lists in your fax campaigns.
- Go to Contacts > Groups.
- Click Add Group.
- Enter the group name, upload a CSV of contacts, add a description if needed, then save.
Individual Contacts
- Go to Contacts > Contacts.
- Click Add Contact.
- Enter the contact’s first name, last name, phone number, email, and any optional address or custom data, then save.
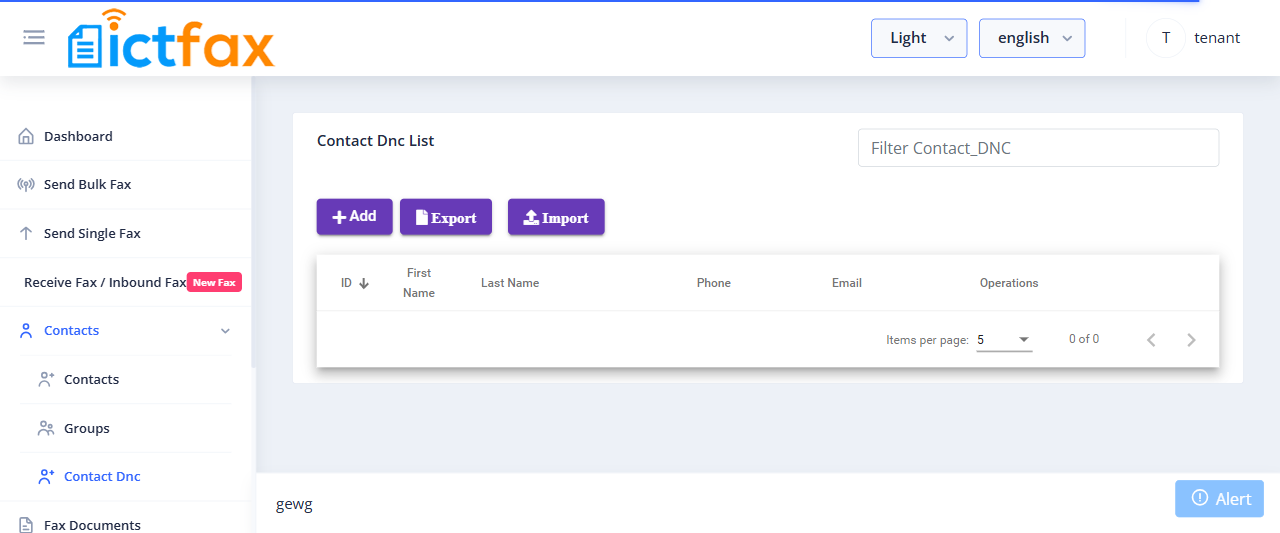
Contact DNC (Do Not Contact)
Add numbers to the DNC list to block them from receiving faxes in any campaign you run. The system checks this list automatically before every send.
- Go to Contacts > Contact DNC.
- Click Add DNC, enter the phone number, and save.
6. Fax Documents
Upload and organize your fax documents. Each document can be reused across multiple campaigns and single sends.
- Go to Fax Documents.
- Click Add Document.
- Enter a document name, upload the file, and select the quality (Standard, Fine, or Super Fine).
7. My DIDs (Fax-to-Email)
Your assigned DID numbers are listed under My DIDs. Each DID can receive incoming faxes, and you can forward any DID to an email address.
- Go to My DIDs.
- Click the forward arrow on a DID.
- Select Fax to Email, enter the destination email, and save.

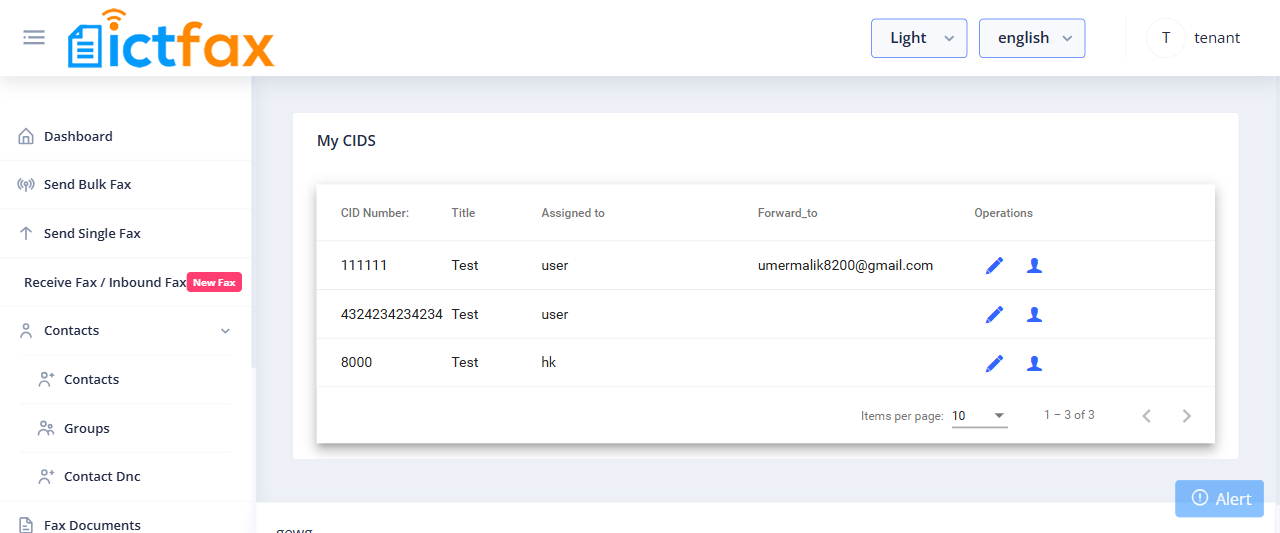
8. My CIDs
My CIDs shows the caller ID numbers assigned to your tenant account. These are the numbers that appear on a recipient’s fax machine when you send outbound faxes. Select a CID when you set up a single fax or campaign.
9. Administration
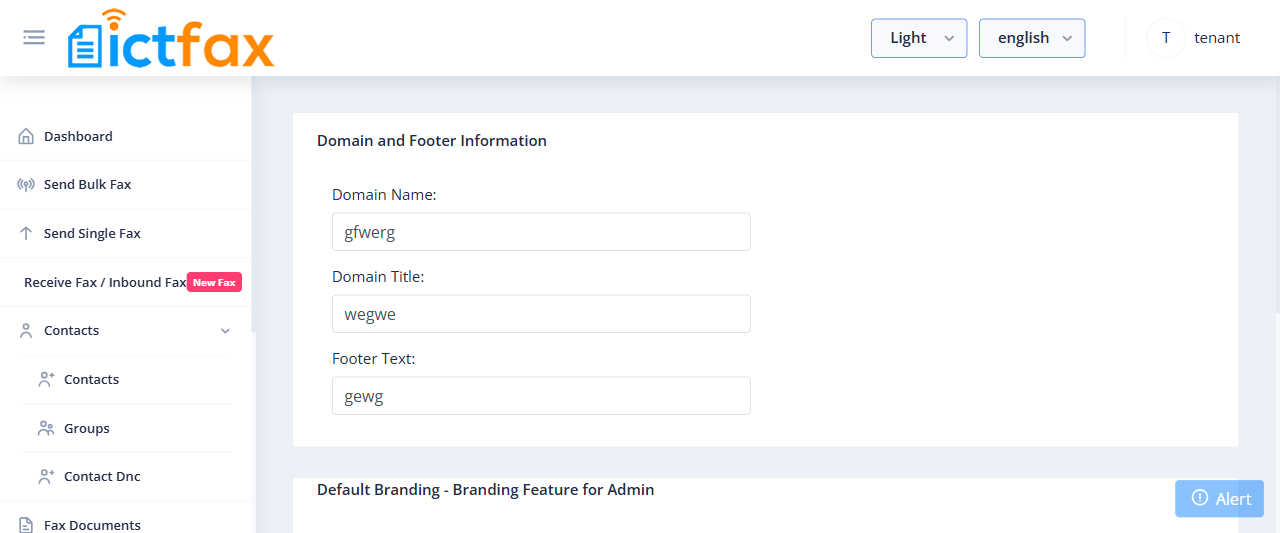
Branding
Set your own company name and logo so that your users see your brand when they log in.
- Go to Administration > Branding.
- Enter your domain name, company name, and footer text.
- Upload your logo, then save.
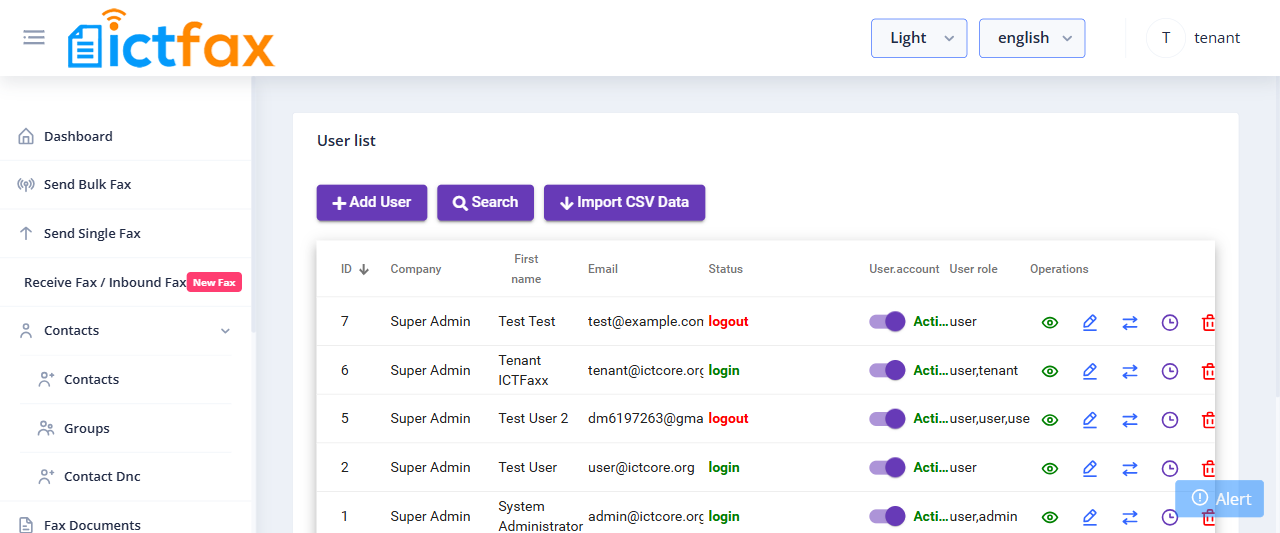
User Management
As a tenant, you can create users who share your fax resources (page limits, DID numbers, trunks). Users you create can send and receive faxes but cannot manage tenant-level settings.
- Go to Administration > User Management.
- Click Add User.
- Enter the user’s name, login email, password, and phone number.
- Select the User role and choose your tenant from the tenant list, then save.
10. Configuration
Fax Settings
Configure fax-specific options for your tenant account, including the fax retention period (how long ICTFax stores your received faxes), default fax quality, and other transmission parameters.
- Go to Configuration > Fax Settings.
- Set the retention period and any other parameters you want to change, then save.
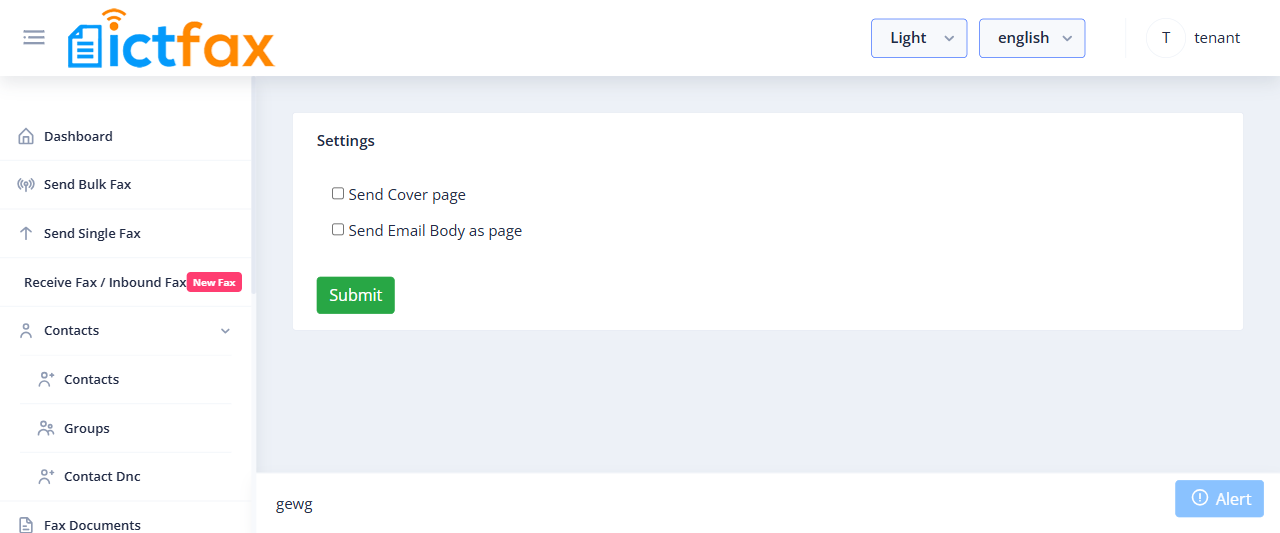
Cover Page
When you enable the cover page, ICTFax prepends a header to every outbound fax showing your contact details (Send By, Send To, Phone, Date, Subject) before the actual document.
- Go to Configuration > Cover Page.
- Enable the cover page and fill in the default sender details, then save.

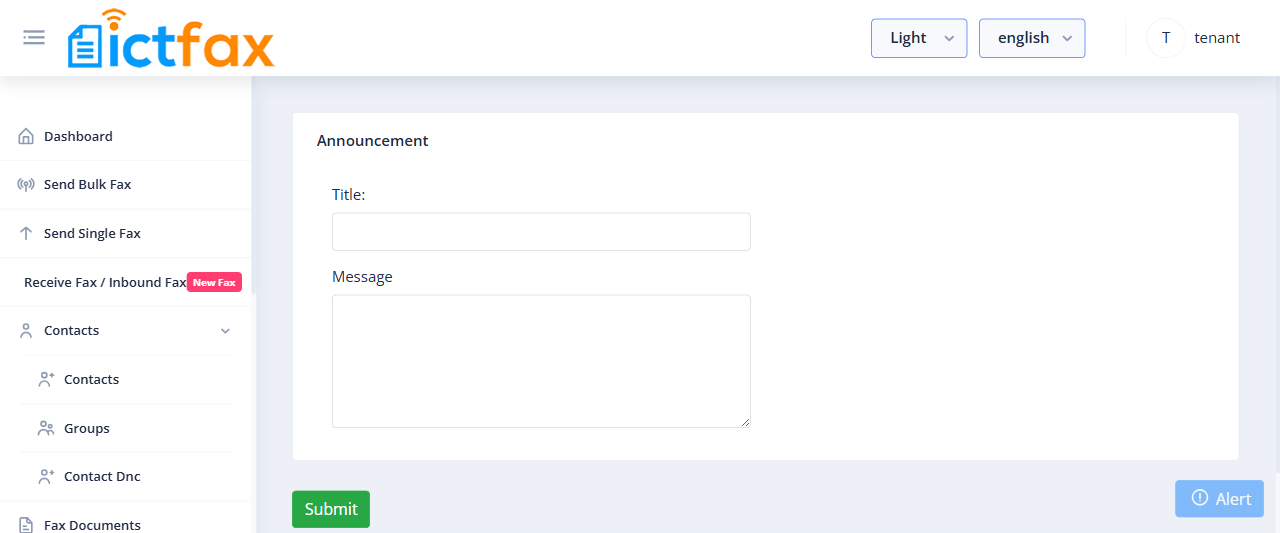
Announcement
Post a notice that your users see when they log in to the portal. Useful for service updates or maintenance windows.
- Go to Configuration > Announcement.
- Enter your message and an optional expiry date, then save.
11. Reports
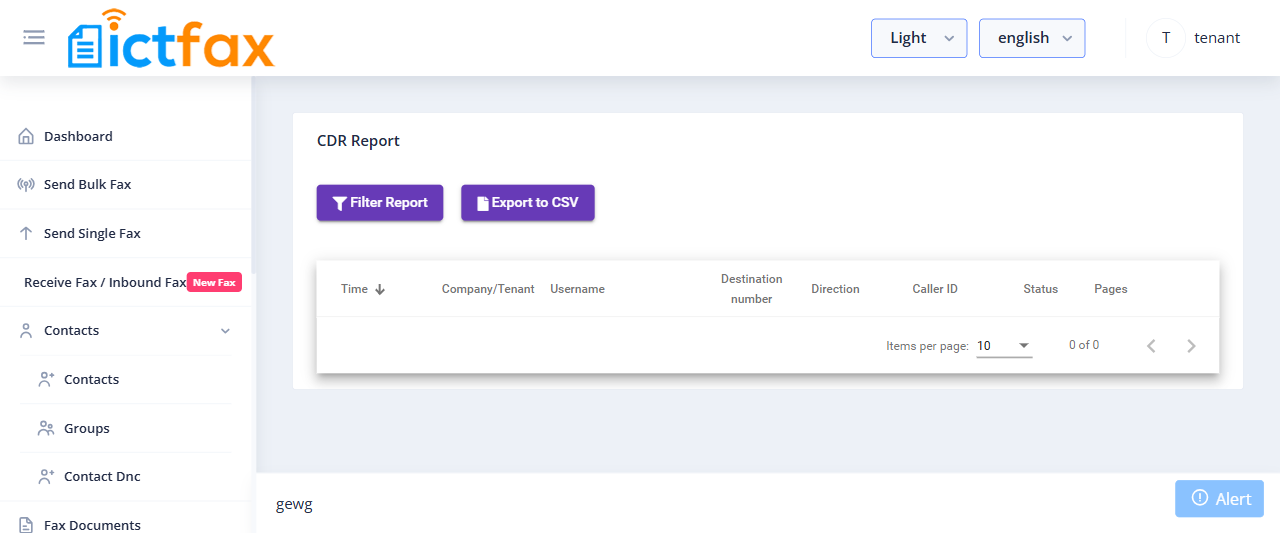
CDR Reports
The CDR report shows the full send/receive history for your tenant account: timestamps, statuses, usernames, destination numbers, and page counts. Export the data to CSV for external analysis.
- Go to Reports > CDR Reports.
- Filter by date range or user, then click Export to download the CSV.
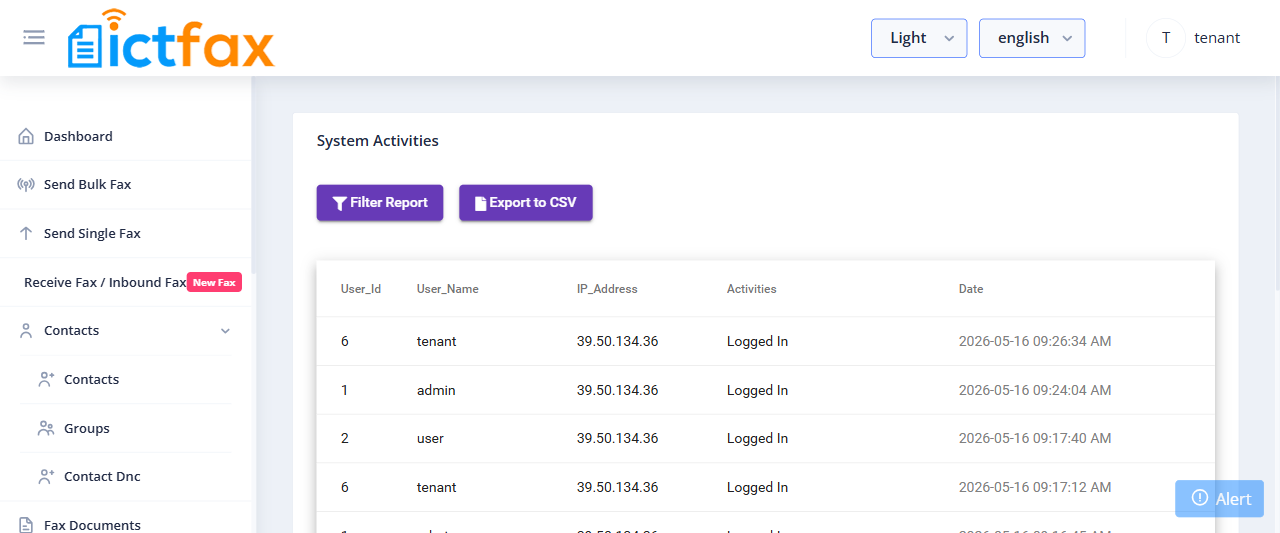
System Activities
System Activities records all actions taken within your tenant account: user logins, configuration changes, user additions and removals. Review this log to audit changes or investigate issues.
- Go to Reports > System Activities.
- Browse or filter by date or user to find the events you need.